

")
")
")


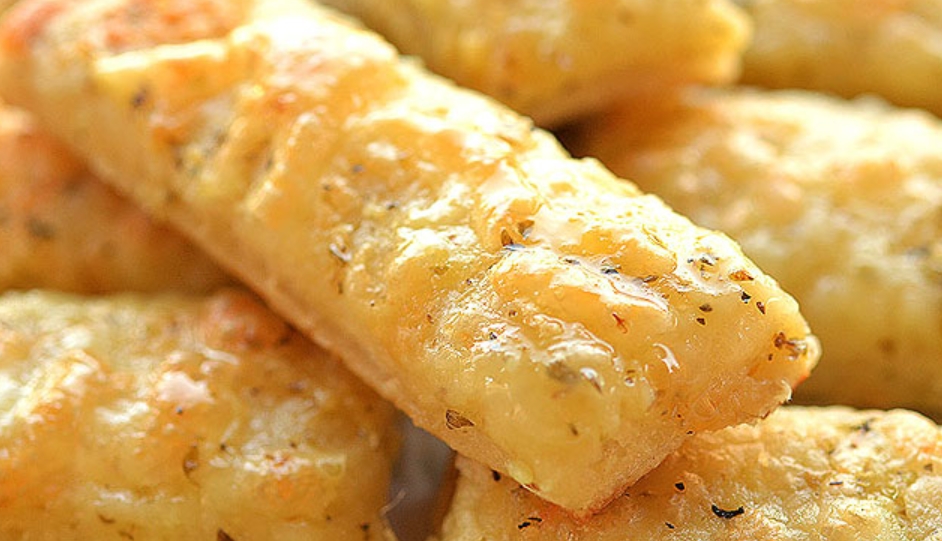
There are some culinary cravings that are universal. That irresistible pull of warm, doughy bread, melted cheese that stretches for miles, and the savory punch of roasted garlic. For years, I thought the ultimate cheesy garlic breadsticks were locked behind the doors of my favorite pizza joint, a special treat only for dine in or delivery nights. But what about those cozy Tuesday nights when you just need that comfort in your own kitchen? That’s the exact inspiration behind this incredibly simple, outrageously delicious Homemade Cheesy Garlic Breadstick recipe.
This is my answer to the “I need something cheesy and fantastic, FAST” conundrum. It’s a semi homemade masterpiece that leverages a brilliant shortcut; refrigerated pizza dough; to deliver maximum flavor with minimal effort. Let’s talk about the flavor profile: imagine a perfectly tender, chewy, and slightly crispy crust, brushed with a rich, garlic infused butter. That buttery base gets blanketed in a generous layer of gooey, bubbling mozzarella, finished with nutty Parmesan and a sprinkle of earthy oregano. It’s the ultimate trifecta: savory, garlicky, and unapologetically cheesy. In just about 15 minutes of active time, you can transform your kitchen into the best pizzeria in town.
Your Secret to Perfect Breadsticks: Pro Tips & Tricks
This recipe is designed for foolproof success, but these insider tips will elevate your breadsticks from great to absolutely legendary.
The Dough Directive
Let your refrigerated pizza dough sit at room temperature on the counter for 20-30 minutes before you try to roll it out. This makes it much more pliable and easier to shape without snapping back. When rolling, don’t stress about perfection; just aim for an even rectangle or circle about 1/4 inch thick.
Garlic Butter Brilliance
For the deepest, most aromatic garlic flavor, use fresh garlic. Press or mince it finely and let it steep in the melted butter for a few minutes before brushing. This infuses every bit of the fat with flavor. For a golden, restaurant style finish, add just a tiny pinch of salt to your garlic butter mixture.
The Pre Cut Secret
Do not skip cutting the dough into strips before baking! This is the #1 pro tip. Using a pizza wheel or sharp knife, slice the cheese covered dough into sticks before it goes in the oven. This ensures you get clean, pull apart breadsticks with perfectly defined edges and no torn, messy cheese when you serve them.
Make Ahead & Storage Instructions
These breadsticks are truly best enjoyed fresh from the oven when the cheese is at its peak gooeyness. However, you can store leftovers in an airtight container in the refrigerator for up to 2 days. To reheat, place them on a baking sheet in a preheated 350°F oven for 5-8 minutes until warm and the cheese softens again. The microwave will make them rubbery, so avoid it if possible.
Freezing Instructions
Yes, you can freeze these! For the best results, freeze them after baking and cooling completely. Place the cooled breadsticks in a single layer on a baking sheet to flash freeze for 1 hour, then transfer to a freezer safe bag or container for up to 2 months. Reheat directly from frozen on a baking sheet at 375°F for 10-12 minutes, or until heated through and crispy.
Step by Step Instructions
Follow these easy steps for golden, cheesy, pull apart perfection every single time.
1Prep the Dough & Oven
Preheat your oven to 425°F (218°C). Line a standard baking sheet with parchment paper for easy cleanup. Take your refrigerated pizza dough and let it rest on the counter while you prep the other ingredients.
2Create the Garlic Butter
In a small bowl, melt the butter. Finely mince or press your clove of garlic and stir it into the warm butter. Let this mixture sit for a few minutes to infuse.
3Shape and Flavor the Base
On the prepared baking sheet, roll or press the pizza dough out into a rough rectangle, about 1/4 inch thick. Using a pastry brush, evenly coat the entire surface of the dough with the garlic butter mixture, going all the way to the edges.
4Add the Cheese
Sprinkle the shredded mozzarella cheese evenly over the buttered dough. Follow with the grated Parmesan cheese and then the dried oregano (if using), distributing everything as evenly as possible.
5The Crucial Pre Cut
Before baking, use a pizza cutter or a very sharp knife to slice the dough into your breadsticks. Cut it first in half lengthwise, then make 7-8 cuts across to create 14-16 equal sized strips. Do not separate them.
6Bake to Perfection
Place the baking sheet in the preheated oven. Bake for 10-12 minutes, or until the crust is golden brown at the edges and the cheese is fully melted, bubbly, and has a few light golden spots.
7Final Cut and Serve
Remove the baking sheet from the oven. Immediately run your pizza cutter back through the pre cut lines to fully separate the breadsticks. Let them cool for just a minute or two on the pan before transferring to a serving plate or basket. Serve warm.
Ingredient Substitutions
This recipe is a fantastic canvas for customization based on your dietary needs or what you have on hand.
- For a Gluten Free Version: Use a certified gluten free pizza crust dough. Many brands now offer this in the refrigerated section.
- For a Vegan Version: Use a vegan pizza dough (check the label), vegan butter, and your favorite plant based mozzarella shreds. Nutritional yeast can be sprinkled on in place of Parmesan for a cheesy flavor.
Common Substitutes:
- Refrigerated Pizza Crust: A 1 pound ball of fresh pizza dough from the grocery store deli works perfectly. Let it come to room temp and roll it out.
- Mozzarella Cheese: A low moisture, part skim block that you shred yourself will melt the best, but pre shredded bags work in a pinch. For more flavor, try a blend of mozzarella and provolone.
- Dried Oregano: Substitute with an equal amount of dried basil, parsley, or an Italian seasoning blend.
- Garlic: In a true emergency, 1/4 teaspoon of garlic powder can be mixed into the melted butter, though fresh is vastly superior.
Serving Suggestions
These breadsticks are the ultimate supporting actor that can steal the show. Here’s how to serve them.
Side Dish Pairings:
Obviously, they are the perfect partner for homemade pizza or a big bowl of comforting pasta like spaghetti and meatballs or baked ziti. They also turn a simple bowl of soup (think tomato, minestrone, or broccoli cheddar) or a crisp garden salad into a complete, satisfying meal.
Dip, Dip, Hooray!
Provide small bowls of warm marinara sauce, creamy ranch dressing, or a garlicky Alfredo sauce for dipping. It takes the experience to the next level!
Drink Pairing:
The savory, cheesy flavors pair wonderfully with a cold, crisp lager or pilsner. For a non alcoholic option, sparkling lemonade or an Italian soda are fantastic choices.
Frequently Asked Questions (FAQ)
Can I use an air fryer to make these?
Yes! Prepare the breadsticks as directed, but you may need to make them in batches. Air fry on a parchment lined basket or tray at 370°F for 6-8 minutes, or until the cheese is bubbly and the crust is golden. Watch closely, as air fryers cook faster.
Can I use homemade pizza dough?
Absolutely! A basic homemade pizza dough recipe (about 1 pound) works wonderfully. Just ensure it has gone through its first rise and has been punched down before rolling out.
My cheese isn’t browning. What can I do?
If your cheese is melted but not getting those lovely golden spots, switch your oven to broil for the last 60-90 seconds of cooking. Watch it like a hawk to prevent burning!
How do I get the cheese extra gooey and stretchy?
The key is using a good melting cheese (like the recommended mozzarella) and not overbaking. Remove the breadsticks from the oven as soon as the cheese is fully melted and just starting to show golden hints.
Equipment List
- Half Sheet Baking Pan (18″x13″): A standard rimmed baking sheet is perfect for this.
- Parchment Paper or a Silicone Baking Mat: For non stick baking and effortless cleanup.
- Pizza Cutter or Sharp Chef’s Knife: Essential for making clean pre cuts and final slices.
- Small Bowl & Pastry Brush: For mixing and applying the garlic butter.
- Box Grater (optional but recommended): For shredding your own block of mozzarella, which melts smoother than pre shredded cheese.
Homemade Cheesy Garlic Breadsticks
Ingredients
- 1 13.8 oz tube refrigerated pizza crust dough
- 1 tablespoon butter melted
- 1 large clove garlic pressed or finely minced
- 3/4 cup mozzarella cheese shredded (more if desired)
- 1 tablespoon Parmesan cheese grated
- 1 teaspoon dried oregano optional
Instructions
- Preheat oven to 425°F. Line a baking sheet with parchment paper.
- Unroll the pizza dough onto the prepared baking sheet. Press or roll it into a rectangle roughly 1/4 inch thick.
- In a small bowl, mix the melted butter and minced garlic. Brush this mixture evenly over the entire surface of the dough.
- Sprinkle the shredded mozzarella and grated Parmesan cheese evenly over the buttered dough. Sprinkle with dried oregano, if using.
- Before baking, use a pizza cutter or sharp knife to cut the dough into 16 equal sized breadstick strips. Do not separate them.
- Bake for 10-12 minutes, or until the crust is golden and the cheese is melted, bubbly, and lightly spotted with gold.
- Remove from oven and immediately re cut along the lines to separate the breadsticks. Serve warm.
Notes
- For Extra Cheese: Feel free to use up to 1 1/2 cups of mozzarella.
- Herb Swap: Dried basil or parsley can replace the oregano.
- Storage: Best fresh. Reheat leftovers in a 350°F oven for 5-8 minutes to restore crispness.
")


")

